Bacon-Wrapped Stuffed Chicken Roll-Ups
This post may contain affiliate links which might earn us money. Please read my Disclosure and Privacy policies hereIf you’re on the hunt for a dinner idea that’s both flavorful and impressive, these bacon-wrapped stuffed chicken roll-ups are a fantastic option for any occasion.
First, the combination of tender chicken, creamy fillings, and crispy, smoky bacon makes this dish an undeniable crowd-pleaser. It’s versatile enough to shine during weeknight dinners yet elegant enough for special gatherings.
Additionally, it’s beginner-friendly, so even if you’re new to cooking, you can confidently prepare this dish. At the same time, its fancy presentation is sure to impress your family and friends. After all, who can resist the allure of bacon-wrapped goodness?
For sides, baked potatoes are an excellent choice for a hearty, comforting meal. For something lighter, a vegetable garden salad pairs wonderfully. Or, if you’re in the mood for indulgence, try serving it alongside a Cheesy Spam Hash Brown Casserole.
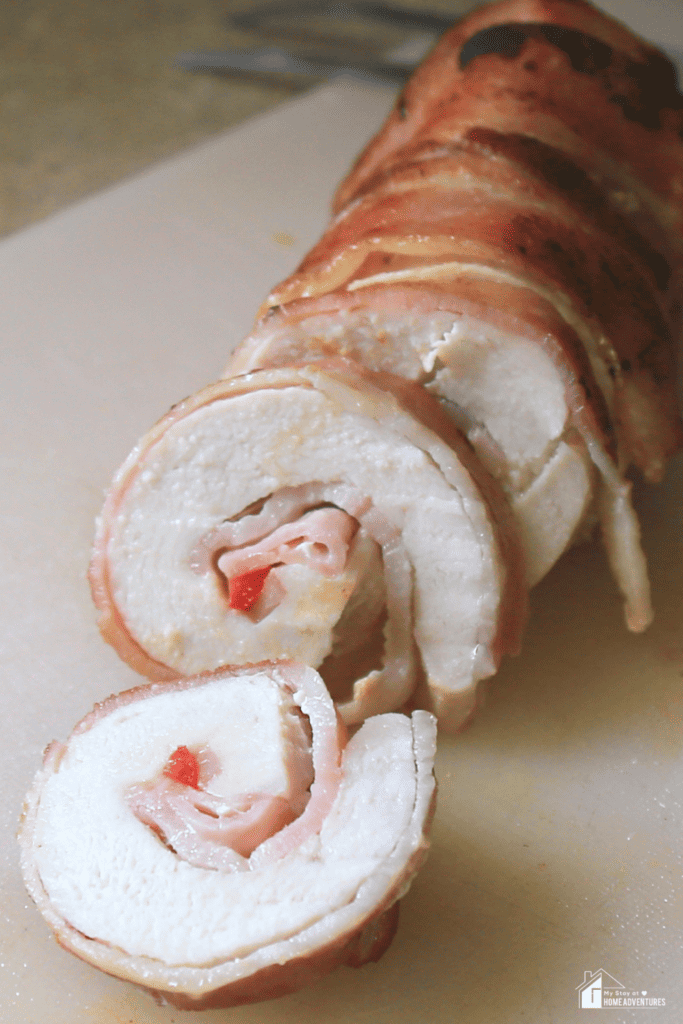
What Are Bacon-Wrapped Stuffed Chicken Roll-Ups?
At their core, they’re boneless chicken breasts flattened and filled with delicious stuffing—anything from cheese, ham, and spinach, to cream cheese and herbs. Once stuffed, the chicken is rolled tightly, wrapped in strips of smoky bacon, and baked to perfection.
This dish combines several elements that many home cooks love: the juiciness of chicken, the creaminess of the stuffing, and the irresistible crunch of crispy bacon. In fact, variations of stuffed chicken have been around for centuries in many cuisines, but wrapping the chicken in bacon adds an extra layer of indulgence.
It's versatile, comforting, and full of flavor, making it a standout option among easy chicken dinner ideas.
Ingredients To Make This Recipe
To make this, you’ll need a handful of simple yet flavorful ingredients. Each one plays a vital role in creating this savory dish.
4 boneless, skinless chicken breasts – The base of the recipe. Chicken breasts are ideal for rolling and stuffing because they’re tender and easy to flatten.
16 uncooked slices of bacon – These wrap around the chicken, adding a smoky, crispy layer to the dish. Use thin-cut bacon for even cooking.
4 slices of mozzarella cheese – Melts beautifully inside the chicken, creating a gooey, cheesy center.
2 slices of cooked ham – Adds a savory layer of flavor to the stuffing.
1 medium red bell pepper, sliced – Brings a slight sweetness and a pop of color to the dish.
Salt and pepper – Essential for seasoning both the chicken and the filling.
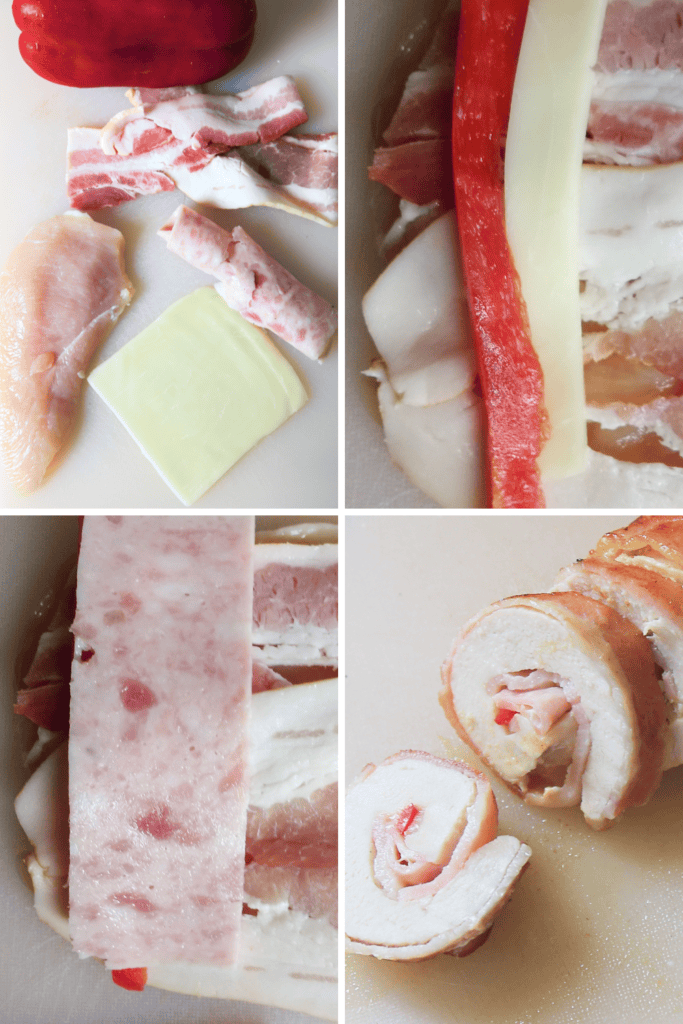
How To Make Stuffed Chicken Roll-Ups
- Preheat your oven to 375°F (190°C).
- Butterfly each chicken breast by slicing it horizontally through the middle, stopping just before cutting it all the way through. Open the chicken like a book.
- To ensure even cooking and easier rolling, place the butterflied chicken between two sheets of plastic wrap and pound it to an even thickness using a meat mallet.
- Lay out four strips of bacon side by side on a clean cutting board. These will form the outer layer of the roll-up.
- Arrange a few slices of red bell pepper in the center of the chicken.
- Top the bell pepper with one slice of mozzarella cheese and half a slice of cooked ham.
- Season with salt and pepper to taste.
- Roll the chicken tightly from one end to the other, making sure to enclose the filling. Wrap the bacon around the outside as you roll.
- Secure the roll-up by wrapping it tightly in a sheet of aluminum foil. Repeat this process for the remaining chicken breasts.
- Bake the foil-wrapped roll-ups on a baking sheet for 25–30 minutes, or until the chicken is fully cooked through.
- After baking, carefully remove the roll-ups from the foil. Heat a skillet over medium-high heat, then sear the roll-ups for a few minutes on each side to crisp up the bacon.
- Allow the roll-ups to rest for a few minutes after searing to let the juices redistribute, keeping the chicken moist.
- Slice the rested roll-ups into even pieces, arrange them on a platter, and serve with your favorite side dishes. Enjoy every bite of creamy cheese, savory ham, and smoky bacon!
Tips For This Easy Chicken Dinner Idea
- Choose thin bacon strips: Thinner bacon will cook more evenly and crisp up nicely.
- Secure the bacon with toothpicks: This helps keep everything in place during baking. Just remember to remove them before serving!
- Don’t overfill the chicken: Too much filling can spill out during cooking. Use just enough to add flavor without overstuffing.
- Use a meat thermometer: The chicken is ready when it reaches an internal temperature of 165°F (74°C).
- Line your baking dish: Use foil or parchment paper to make cleanup easier and prevent sticking.
Frequently Asked Questions
Can I make these roll-ups ahead of time?
Yes! You can assemble the chicken roll-ups a day in advance and store them in the refrigerator. When ready to cook, simply bake as directed. This makes them a great option for meal prepping or hosting dinner parties.
Can I use turkey bacon instead of regular bacon?
Absolutely. However, if you prefer a lighter option, turkey bacon works well. Keep in mind that it won’t crisp up as much as regular bacon, so you may want to broil it for a few minutes at the end of baking.
What other fillings can I use?
The filling is highly customizable. Some delicious options include sun-dried tomatoes and feta cheese, sautéed mushrooms and onions, or even pesto and parmesan. Feel free to get creative and tailor the flavors to your liking.

Have you tried bacon-wrapped stuffed chicken roll-ups yet? If so, let us know what you think! Be sure to rate and review the recipe below. And if you’re looking for more easy chicken dinner ideas, be sure to check out our other recipes for inspiration. Happy cooking!
Other Recipes You Might Like:
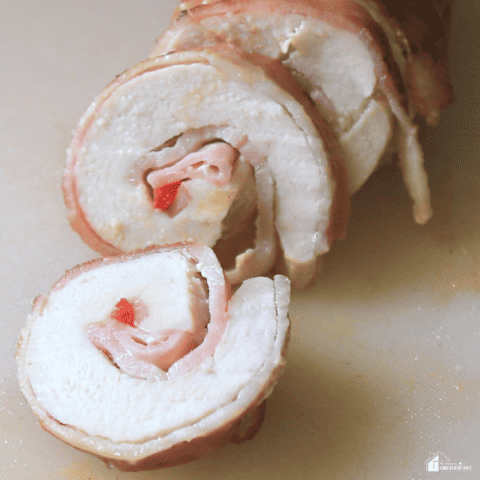
Bacon Wrapped Stuffed Chicken Roll Ups Recipe
If you're looking for a simple yet impressive meal idea, Bacon-Wrapped Stuffed Chicken Roll-Ups are the perfect choice! This recipe combines tender chicken breasts, crispy bacon, melted mozzarella, and a savory filling of ham and red bell pepper.
Each bite is packed with flavor, making it an excellent option for family dinners or entertaining guests. With just a few steps and minimal prep time, you'll have a dish that's as visually stunning as it is delicious.
Let's bring this mouthwatering dinner idea to life in your kitchen!
Ingredients
- 4 chicken breasts
- 16 uncooked slices of bacon
- 4 even slices of Mozzarella cheese
- 2 slices of cooked ham
- Medium red bell pepper - sliced
- Salt and pepper to taste
Instructions
- Preheat your oven to 375°F.
- Take the chicken breasts and butterfly them. To do this, cut each one horizontally down the center, being careful not to cut all the way through. Open it up like a book.
- Use a meat mallet or rolling pin to pound the chicken gently until it’s an even thickness. This helps it cook evenly.
- Lay out four strips of bacon side by side on a clean surface, overlapping slightly.
- Place a slice of red bell pepper on the middle of the chicken.
- Add a slice of mozzarella cheese on top of the pepper.
- Lay a piece of ham over the cheese.
- Sprinkle salt and pepper over the chicken to season.
- Roll the chicken up tightly, ensuring the fillings are secured inside. Wrap the bacon around the roll completely.
- Wrap the bacon-wrapped chicken roll tightly in aluminum foil.
- Place the wrapped rolls on a baking sheet and bake for about 25–30 minutes.
- Once baked, remove the rolls from the foil and transfer them to a hot pan or skillet. Cook until the bacon is crispy and golden brown on the outside.
- Let the chicken rest for a few minutes before slicing into even pieces.
- Serve and enjoy your delicious Bacon Wrapped Stuffed Chicken Roll-Ups!
Notes
Pound the Chicken Evenly: When pounding the chicken, aim for a uniform thickness to ensure even cooking and prevent undercooked spots in the center.
Secure the Rolls: Use toothpicks to keep the rolls tightly closed while cooking if you’re worried about them unraveling. Remember to remove them before serving!
Bacon Tips: If you prefer extra crispy bacon, you can partially cook it before wrapping it around the chicken. Be careful not to overcook it, as it will cook further in the oven and pan.
Foil Wrapping: Wrapping the rolls in foil helps seal in moisture and prevents the bacon from drying out during baking. Ensure the foil is tightly sealed for the best results.
Check for Doneness: Use a meat thermometer to check that the internal temperature of the chicken reaches 165°F to ensure it’s fully cooked.
Customize Your Filling: Feel free to experiment with different fillings like spinach, sun-dried tomatoes, or a mix of cheeses for variety.
Pan-Searing: After baking, use a nonstick skillet or cast iron pan for searing. It helps achieve that golden, crispy bacon finish.
Let it Rest: Allow the chicken to rest for a few minutes after cooking. This helps the juices redistribute, making the chicken tender and easier to slice.
Serving Suggestion: Pair these roll-ups with a fresh side salad, roasted vegetables, or mashed potatoes for a complete meal.
Nutrition Information:
Yield: 5 Serving Size: 1Amount Per Serving: Calories: 443Total Fat: 23gSaturated Fat: 9gTrans Fat: 0gUnsaturated Fat: 12gCholesterol: 153mgSodium: 1157mgCarbohydrates: 3gFiber: 0gSugar: 2gProtein: 54g
These nutritional calculations might not be accurate. Please speak with a licensed nutritionist to assist you.
ave




4 Comments