How to Make Perfect Puerto Rican Arepas at Home
This post may contain affiliate links which might earn us money. Please read my Disclosure and Privacy policies here
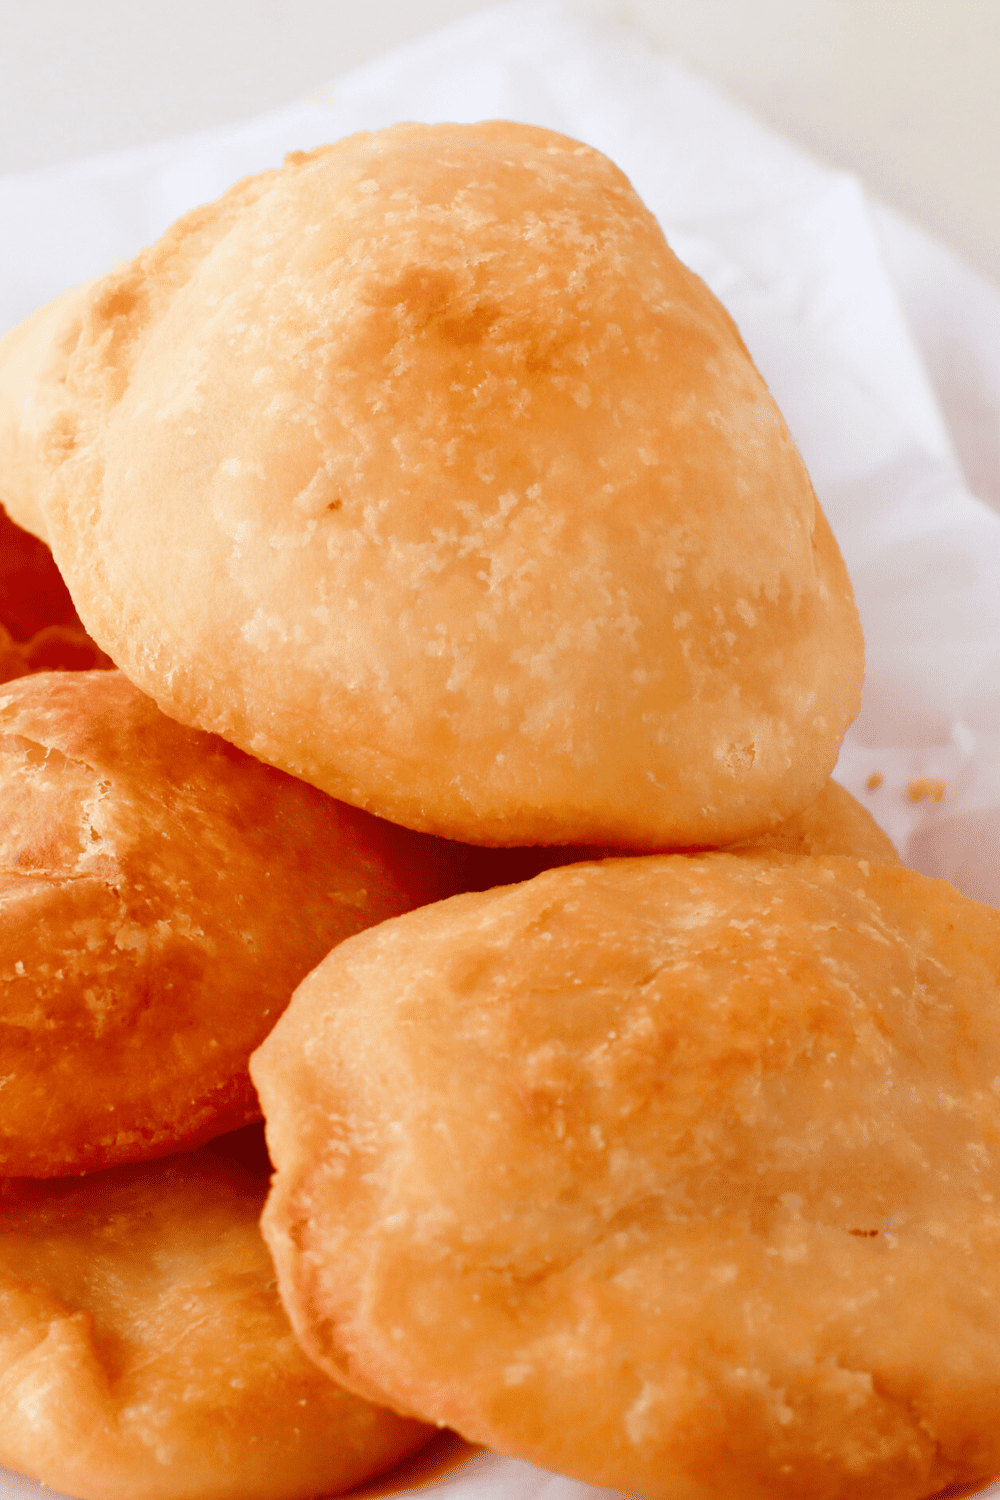
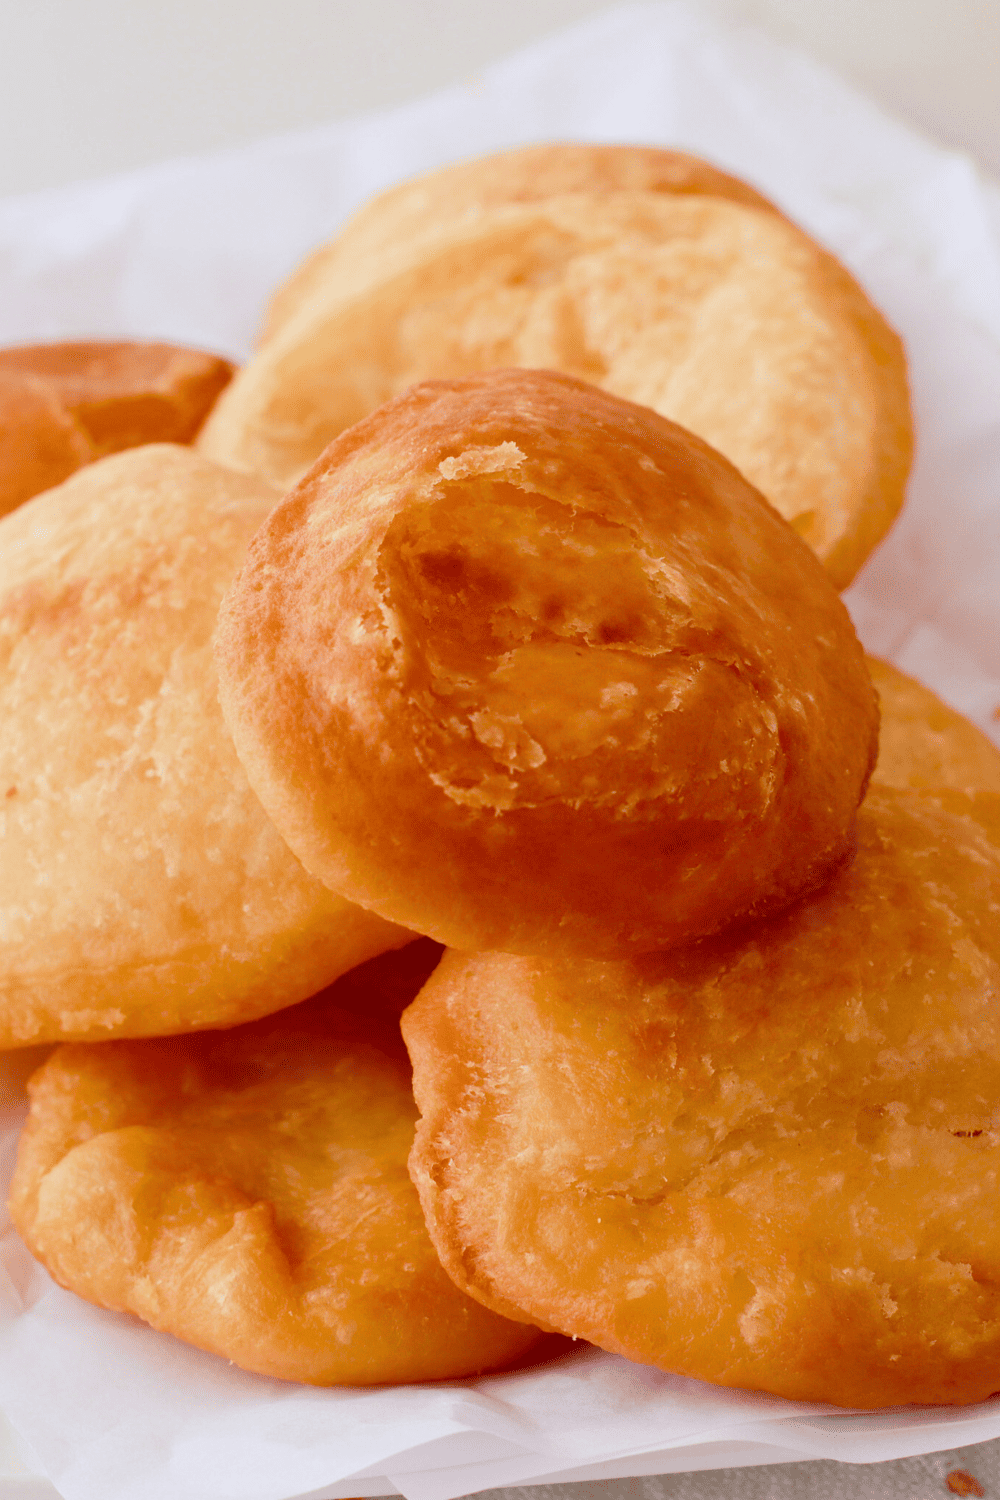
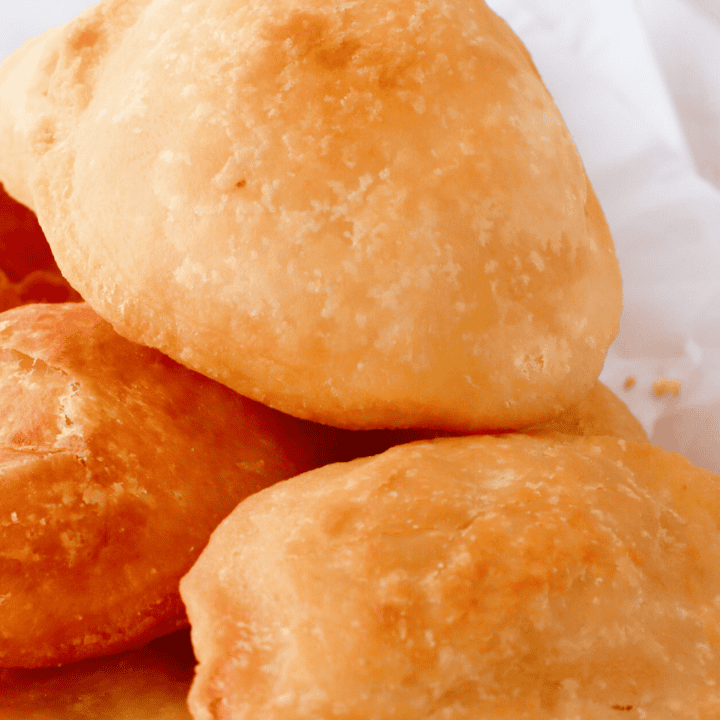
Puerto Rican arepas are a beloved staple in many Caribbean kitchens, known for their crispy exterior and soft, warm center. These golden delights are incredibly versatile and can be paired with a variety of toppings, from savory shredded beef to melted cheese or fresh avocado.
They are traditionally served with Puerto Rican stewed beans (habichuelas guisadas), a flavorful dish made with slow-cooked beans and sausage, or picadillo, a delicious ground beef mixture with olives, tomatoes, and seasonings. Arepas also pair well with roasted vegetables, cheese, butter, or a warm bowl of soup. Whether enjoyed for breakfast, lunch, or dinner, they are a comforting and satisfying dish.

What Are Puerto Rican Arepas?
Puerto Rican arepas, also known as arepas de coco in some regions, are small, round cakes made from either cornmeal or flour, cooked until golden brown. Unlike Venezuelan or Colombian arepas, Puerto Rican arepas often have a slightly sweeter taste and can even be made with coconut milk for extra richness.
These delicious fried breads date back to the indigenous Taíno people of the Caribbean, who prepared similar corn-based cakes long before European colonization. Over time, the recipe evolved, incorporating new ingredients like flour and butter. Today, Puerto Rican arepas are commonly enjoyed with stews, beans, or meats, making them a favorite comfort food.
Ingredients to Make This Recipe
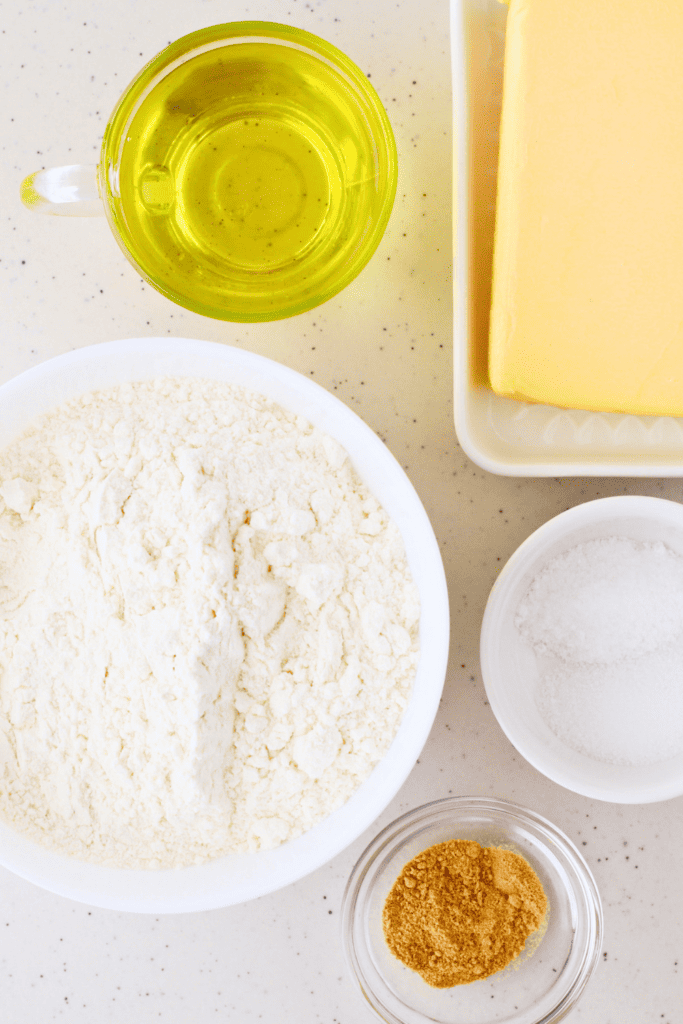
Making Puerto Rican arepas only requires a few simple ingredients, but each one plays an important role in the final result. Before getting started, gather everything you need:
- Flour – Used in this recipe instead of cornmeal, giving the arepas a softer texture.
- Sugar – A touch of sweetness that balances the flavors.
- Garlic powder – Adds a subtle depth of flavor that enhances the overall taste.
- Butter – Softened butter helps create a rich, flaky texture.
- Salt – Brings out the flavors and balances the other ingredients.
- Vegetable oil – Used for frying, giving the arepas their crispy golden crust.
Now that you have everything ready, let’s go step by step to create the perfect batch of homemade Puerto Rican arepas.
How to Make Homemade Puerto Rican Arepas
Making Puerto Rican arepas is easier than you might think. Follow these simple steps to get a delicious batch every time.
1. Prepare the Dough
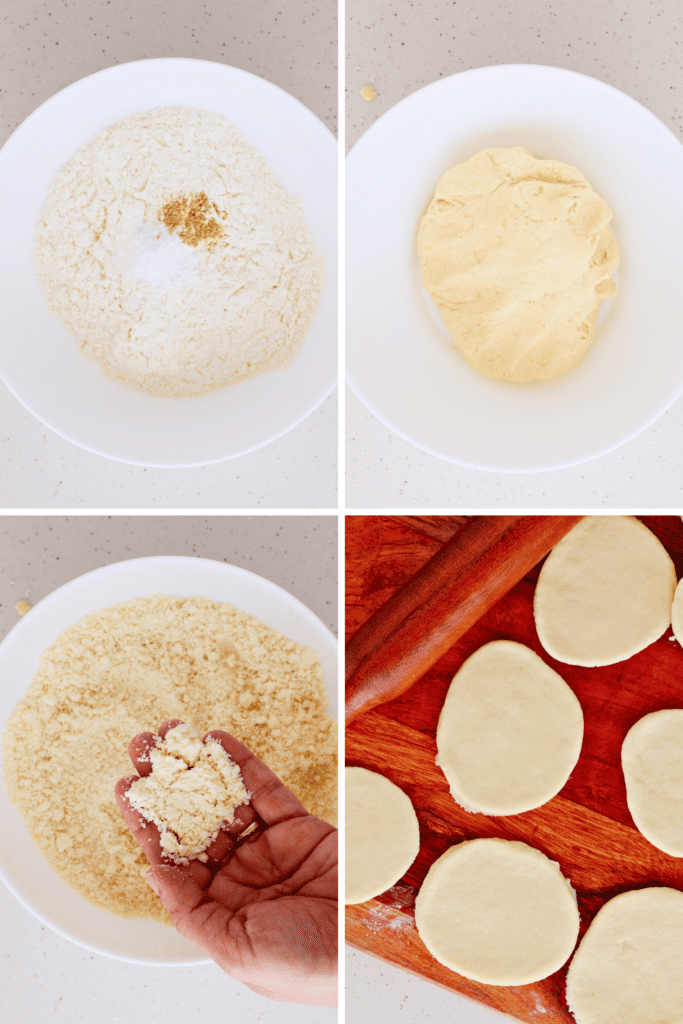
Start by combining the flour, sugar, garlic powder, and salt in a mixing bowl. Mix well to evenly distribute the ingredients. Add the butter and use your hands to knead the mixture until it has a grainy texture.
2. Add Water and Rest the Dough
Gradually add water to the flour mixture, stirring continuously until a soft dough forms. Knead it for a minute or two, then cover the bowl with plastic wrap and let it rest for 30 minutes. This step helps the flour absorb the moisture, making the dough easier to work with.
3. Roll and Cut the Dough
Lightly flour a clean surface and roll out the dough to about ¼ inch thick. Use a round cutter or a small bowl to cut out circles. Try to make them uniform in size so they cook evenly.
4. Heat the Oil
Pour vegetable oil into a frying pan and heat it over medium-high heat. You’ll know it’s ready when a small piece of dough dropped into the oil sizzles immediately.
5. Fry the Arepas
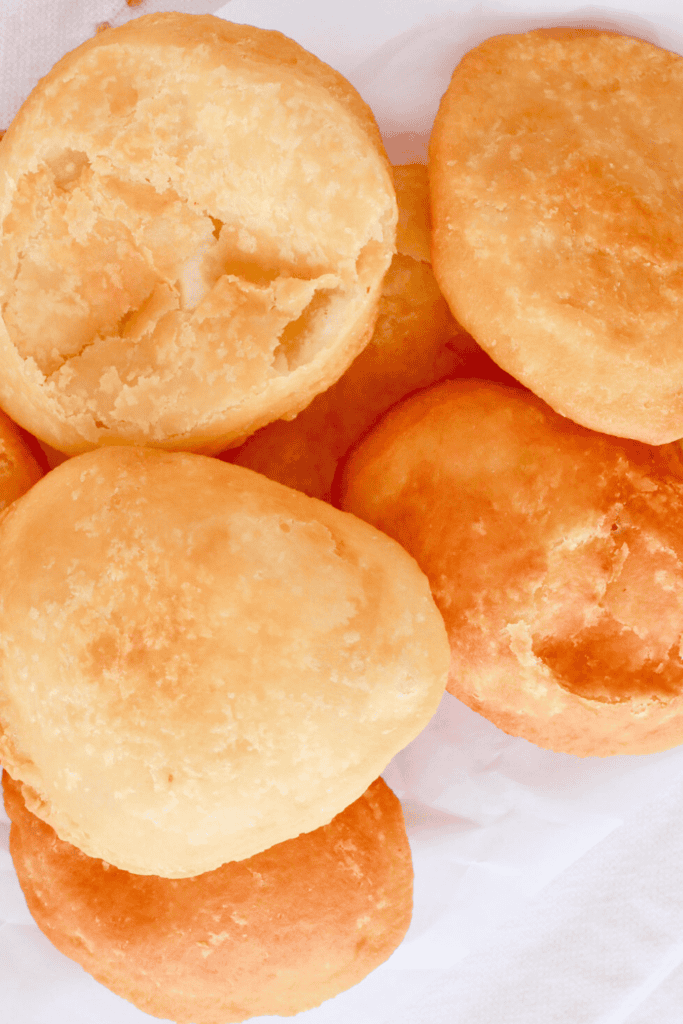
Carefully slide 1-3 arepas into the hot oil. Fry for about 30-45 seconds per side, or until they turn golden brown. Use a slotted spoon to remove them from the oil and place them on a plate lined with paper towels to absorb any excess oil.
6. Serve and Enjoy
Once all the arepas are fried, serve them warm with your favorite fillings or sides.

Tips for Making the Best Puerto Rican Arepas
Making homemade Puerto Rican arepas is simple, but these tips will ensure you get the best results:
- Let the dough rest – This makes it easier to roll out and prevents cracking.
- Don’t over-knead – Too much kneading can make the arepas tough instead of soft.
- Test the oil temperature – If the oil isn’t hot enough, the arepas will absorb too much oil and become greasy. If it’s too hot, they might burn before cooking through.
- Use the right flour – If you prefer a more traditional arepa, you can experiment with pre-cooked cornmeal instead of flour.
- Serve immediately – Arepas taste best fresh and warm, so enjoy them right away.
Frequently Asked Questions
Can I use cornmeal instead of flour?
Yes! Traditional arepas are made with pre-cooked cornmeal, also known as masarepa. Using it will give you a slightly different texture, but they will still be delicious.
How do I store leftover arepas?
If you have leftovers, store them in an airtight container at room temperature for up to 24 hours. For longer storage, keep them in the refrigerator and reheat in a skillet or oven before serving.
Can I make the dough ahead of time?
Yes, you can prepare the dough in advance and store it in the refrigerator for up to 24 hours. Just make sure to wrap it tightly in plastic wrap to prevent it from drying out.
What can I fill arepas with?
Arepas can be filled with just about anything! Some popular fillings include shredded chicken, melted cheese, black beans, avocado, and scrambled eggs.
Have you tried making Puerto Rican arepas? If so, let me know how they turned out! Don’t forget to rate and review the recipe to share your experience. Once you try them, you’ll want to make them again and again!
Easy Homemade Puerto Rican Arepas Recipe
Crispy on the outside and soft on the inside, these Puerto Rican arepas are a delicious fried bread that can be enjoyed with a variety of dishes.
Unlike Colombian arepas or Venezuelan arepas, this version is made with flour instead of cornmeal, giving them a lighter texture. Whether served with Puerto Rican stewed beans, picadillo, or simply with butter and cheese, they make the perfect addition to any meal.
If you’ve never made homemade arepas before, don’t worry! This simple fried arepas recipe requires just a few basic ingredients and comes together quickly.
In just a few steps, you’ll have warm, golden arepas ready to serve. Try them for breakfast, as a side dish, or as a tasty snack any time of day.
Ingredients
- 1 ½ cups flour
- ¼ tsp sugar
- ½ teaspoon garlic powder
- ¼ cup softened butter
- Salt to taste
- Vegetable oil for frying
Instructions
- Mix the dry ingredients. In a large mixing bowl, combine flour, sugar, garlic powder, and salt. Stir well to evenly distribute the ingredients.
- Incorporate the butter. Add butter to the dry mixture and use your hands to knead it in until the mixture has a grainy texture. The butter should be well incorporated, but the mixture will still be crumbly.
- Add water and knead the dough. Slowly pour in water while mixing continuously. Once the dough starts coming together, knead it with your hands until it becomes smooth and soft. If the dough feels too sticky, add a little more flour; if it’s too dry, add a small amount of water.
- Let the dough rest. Cover the bowl with plastic wrap and let the dough rest for 30 minutes. This allows the ingredients to fully combine and makes the dough easier to work with.
- Roll and cut the arepas. Lightly dust a clean surface with flour and place the dough on it. Roll it out to about ¼ inch thick. Use a round cutter, glass, or small bowl to cut out circles. Try to keep them uniform in size so they cook evenly.
- Heat the oil. Pour enough vegetable oil into a frying pan to submerge the arepas slightly. Heat it over medium-high heat until it’s hot but not smoking. To test, drop a small piece of dough into the oil—if it sizzles, it’s ready.
- Fry the arepas. Carefully place 1-3 arepas into the hot vegetable oil, depending on the size of your pan. Fry each one for about 30-45 seconds per side or until golden brown. Use tongs or a slotted spoon to flip them gently.
- Drain and cool. Once golden and crispy, remove the arepas from the oil and place them on a plate lined with paper towels to absorb excess oil. Let them cool slightly before serving.
- Serve and enjoy. Enjoy the arepas warm with your favorite toppings, such as cheese, butter, or alongside a dish like Puerto Rican stewed beans or picadillo.
Notes
Let the dough rest. Allowing the dough to rest for 30 minutes helps it become more pliable and easier to roll out. Skipping this step may result in arepas that crack or break.
Don’t over-knead. Knead just until the dough is smooth and soft. Over-kneading can make the arepas tough instead of light and flaky.
Test the oil temperature. If the oil is too cold, the arepas will absorb too much oil and become greasy. If it’s too hot, they will burn before fully cooking. A small test piece of dough should sizzle immediately when dropped into the oil.
Use the right thickness. Rolling the dough too thin can make the arepas hard and crunchy instead of soft on the inside. Aim for about ¼ inch thick for the perfect texture.
Fry in batches. Avoid overcrowding the pan, as this can lower the oil temperature and make the arepas cook unevenly.
Keep an eye on the color. The arepas should turn golden brown, not dark brown. If they darken too quickly, lower the heat slightly.
Serve immediately. Arepas taste best fresh and warm, so enjoy them right after frying. If needed, you can reheat them in a skillet for a few minutes to crisp them back up.
Recommended Products
As an Amazon Associate and member of other affiliate programs, I earn from qualifying purchases.


Nutrition Information:
Yield: 12 Serving Size: 1Amount Per Serving: Calories: 102Total Fat: 5gSaturated Fat: 3gTrans Fat: 0gUnsaturated Fat: 2gCholesterol: 10mgSodium: 79mgCarbohydrates: 12gFiber: 0gSugar: 0gProtein: 2g
These nutritional calculations might not be accurate. Please speak with a licensed nutritionist to assist you.