Start a Blog In 5 Minutes
This post may contain affiliate links which might earn us money. Please read my Disclosure and Privacy policies hereSo you want to start a blog and you want to get this part done as easy as possible?
Then you came to the right place!
Now starting a blog opened the doors for many bloggers to financial success. If you have been following my blog you know that I went from a working mom to a stay at home mom who is continuing to make an extra income from home.
I am a mom of 4 who decided to invest in a blog and I haven't looked back ever since. Starting a blog doesn't have to cost you much and we go into details about it in this post here.
You can make as much money as you want online and the possibilities are endless. For me, deciding to take this blog to the next level and start earning some money was my goal.
If you are dead set that blogging is what you want to do and you are ready to take your blog to the next level then I suggest you self-host your blog or site.
Starting a blog is easy. And if you don’t, believe me, I will show you step by step so you can have your blog set up and you can start your new stay at home adventure!
My Stay At Home Adventures has created in less than 5 minutes thanks to how simple BlueHost made it for me.
However, I’m comfortable with these types of things and the process it takes to start a blog. I also know that not everyone will know how to start a blog or feel comfortable with this process.
Before I begin with this starting a blog with BlueHost I will say this, anyone can start a blog but not everyone will be able to start a blog that will make them money. You read my reports and my struggles with making this blog profitable. Just like any other business it takes time and hard work.
I also have invested my time and money into my blog business but more about that on a later post. Now with this set u,p I am assuming that you already know that blogging is what you want to do and you have already done your research and have already picked the perfect domain for your blog.
Start a Blog in 5 Minutes
Head over to Bluehost and click the green button that stays “get started now.”
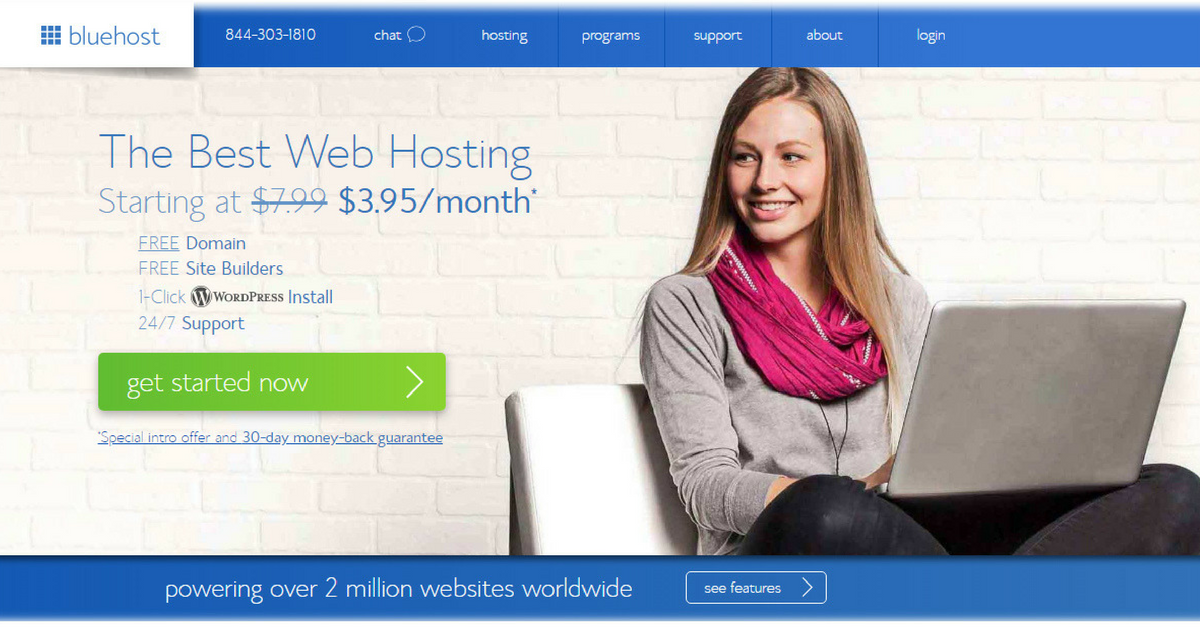
Next, you will see a screen that looks like the one below.
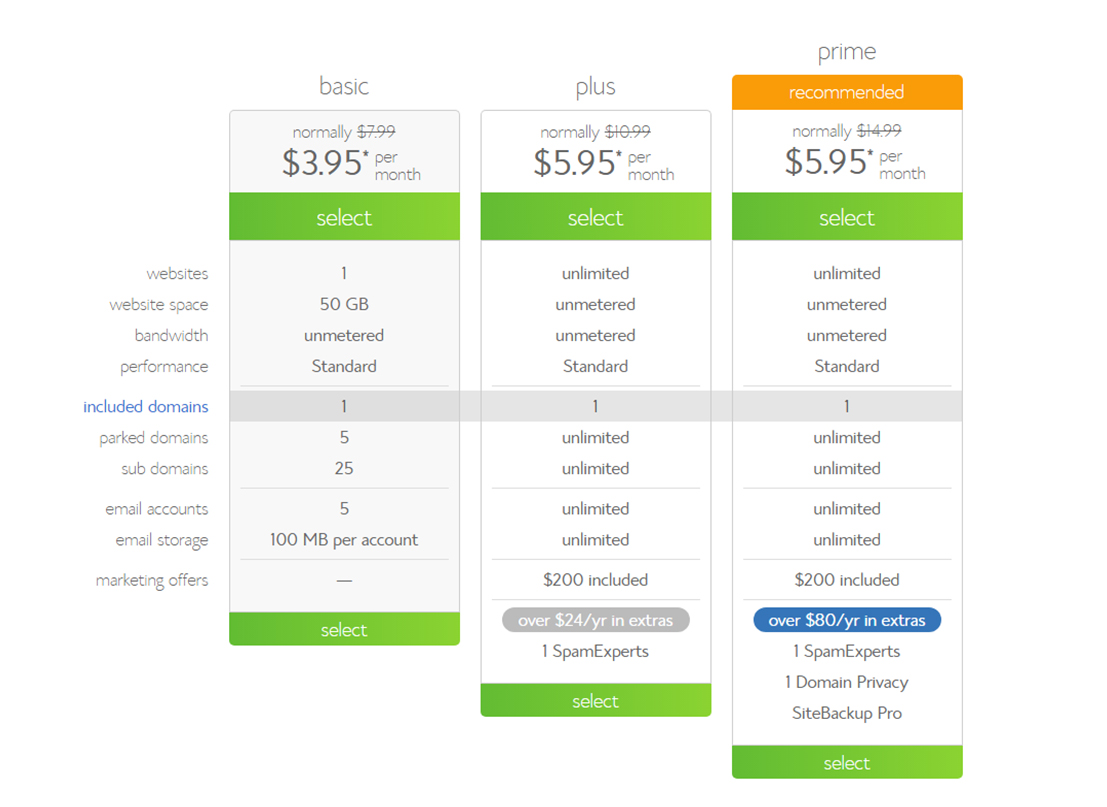
You will see that BlueHost offers has 3 types of starter plans:
- Basic
- Plus
- Prime – most popular
Select the plan that works for you.
When I first started My Stay At Home Adventures in 2013 I selected Plus because I loved the price and what it offered. However, you may want to start slow and depending on your traffic and blog growth BlueHost makes it easy for you to upgrade.
My advice is to get prime for as it is the same price as Plus, but this is my opinion and this might be subject to change.
Important information that you need to know is that you pay the lowest amount when you pay for more time. For example, I paid for 3 years of service that reduced my monthly cost to the lowest price, but more about that later.
Step 2 – Pick your domain
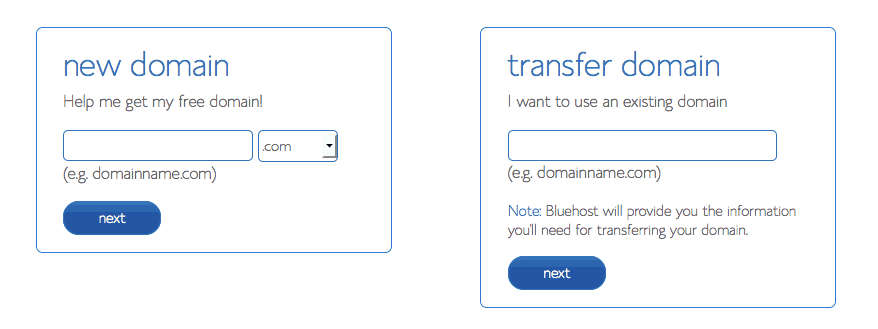
This is where you select the domain and check for availability of it.
If you already have a domain with another company head to the “I have a domain name” block and add your domain name inside that box and click next.
To select a new domain and check for its availability type your domain and select next. If your domain is available you will move to the next step. If not you are going to have to continue to find a domain that is available.
Decided what you picked your will heading to fill out your account information.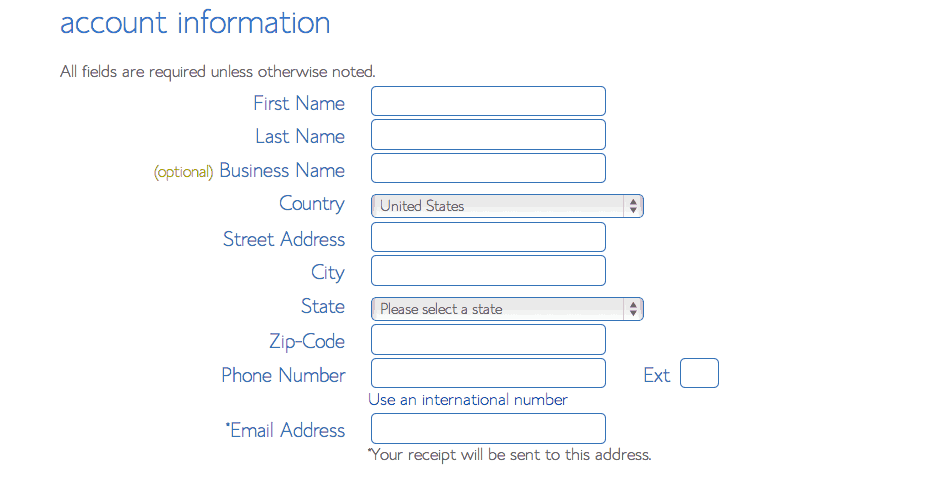
On this page, you will key in your personal information.
After that, you will select a package information. This is where I say that the longer you select the plan the less you will pay each month. See the photo below for an example of prices of the Stater plan. This is the price you will pay out front!
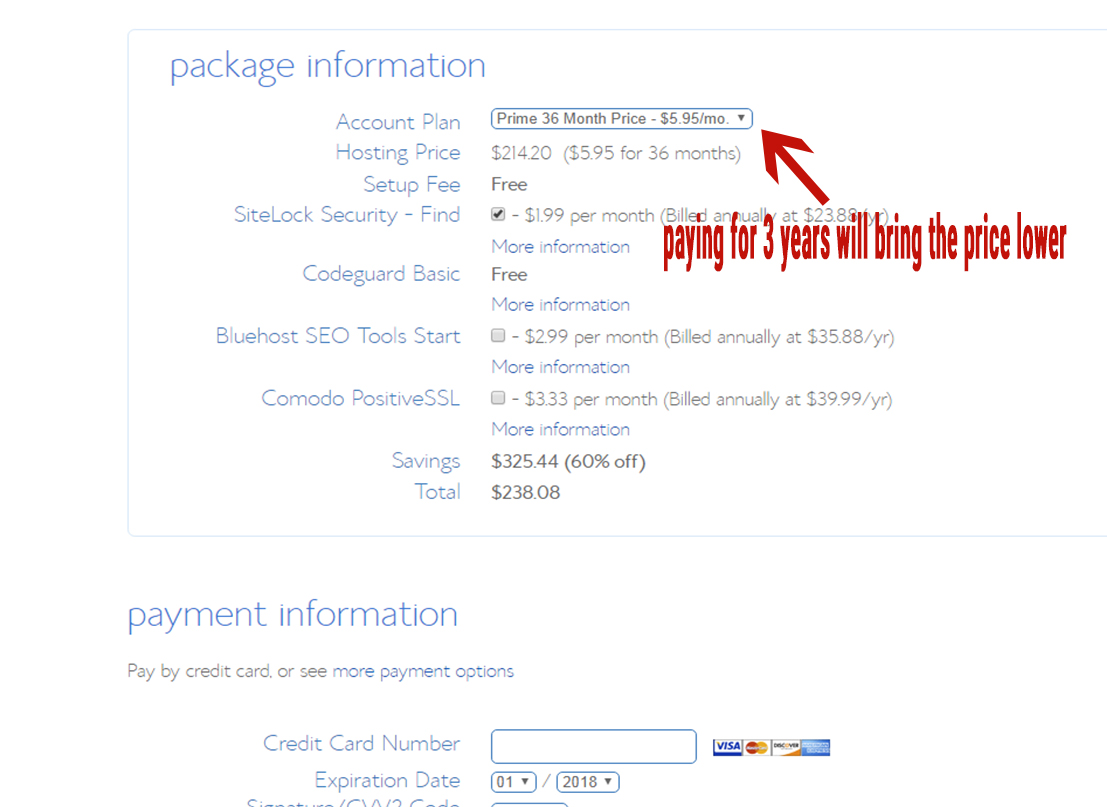
You are going to notice here that the prices are this low if you pay for 3 years. The above photo is when we chose Prime Plan and below is if you choose the Basic Plan.
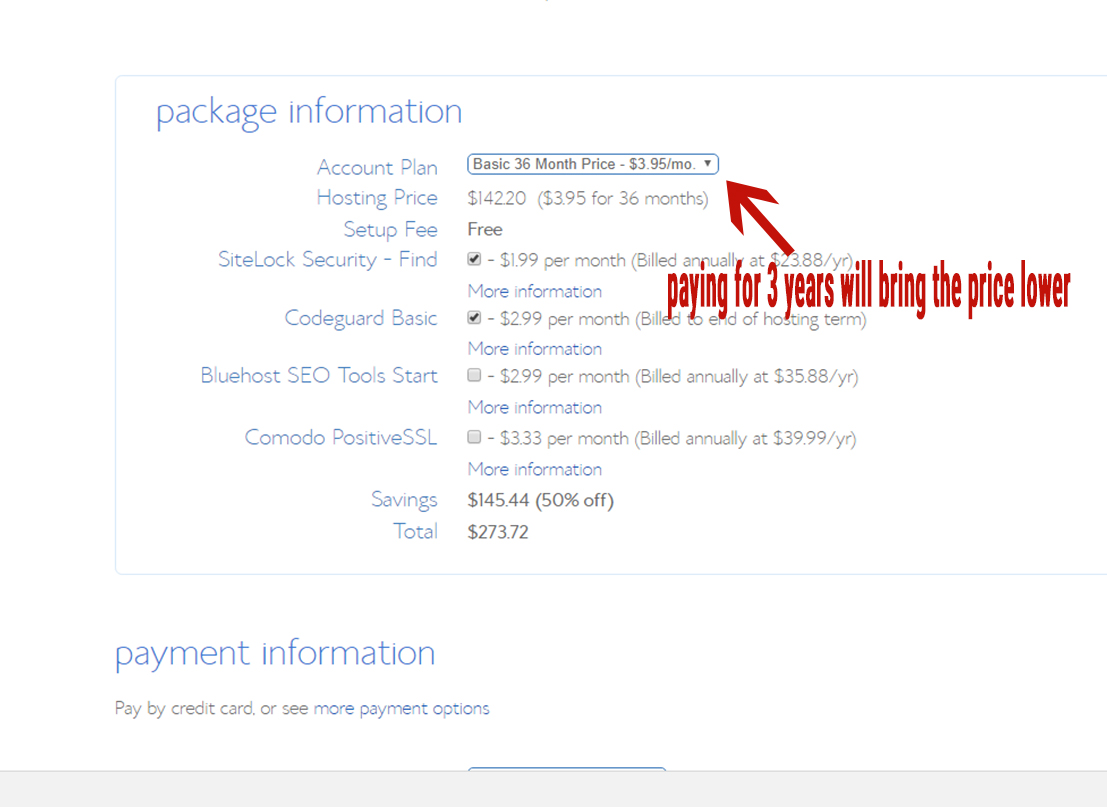
There are many other additional options available to add to your package.
I suggest you add this later and use a plugin to back up your site in case something happens and you don't lose all your work.
Congratulations you have created your BlueHost account!
Changing Name Servers at Bluehost
Below is a video that shows you how to change your namserverer at Bluehost.
Installing WordPress
I strongly recommend installing WordPress and using it as your blogging platform.
Bluehost makes it easy to install WordPress and other blogging platforms. Below I will show you step by step process on how to install WordPress to your site.
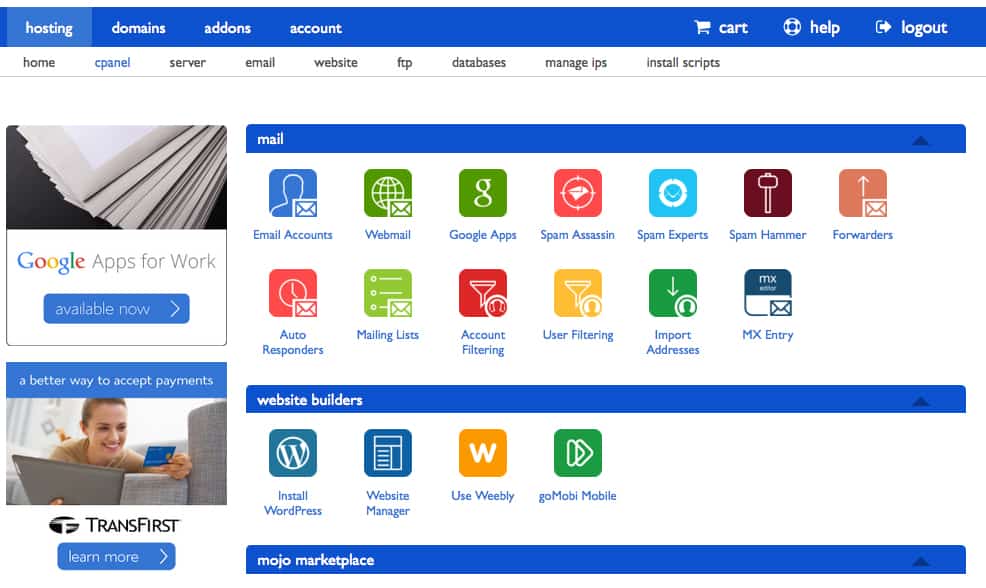
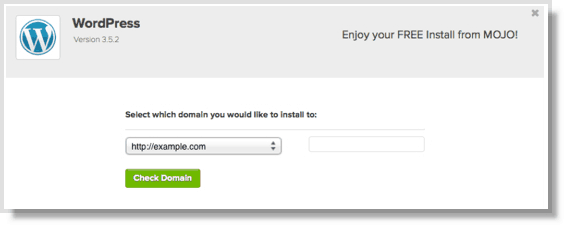
Click your cpanel and under website builder click Install WordPress.
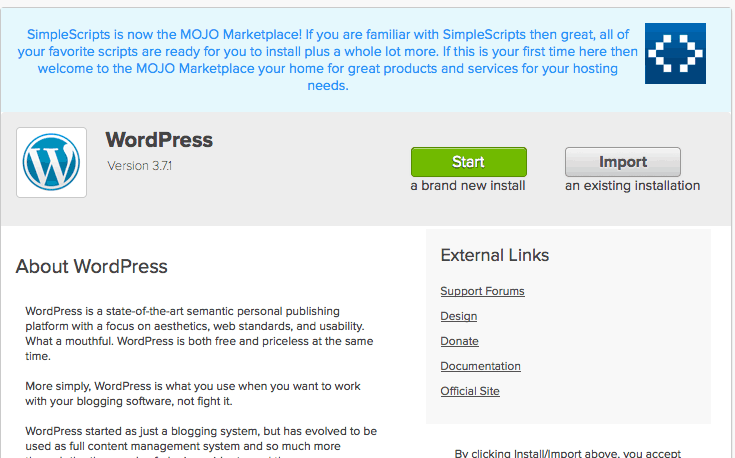
Click Start then select the domain you would like to install on your blog (see photo below).
Fill out your WordPress information.
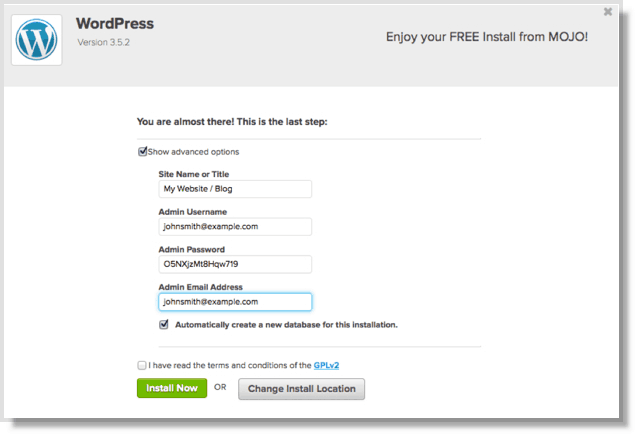
Create your WordPress username by filling out the box above. Click Install Now to start the installing process.

Congratulations you have successfully installed WordPress!
A few things you need to know:
- It will take a few minutes to hours for your site to show up.
- You might be required to call BlueHost for security reasons. This happened to me before.
As you can see starting a blog is not as hard as you thought. If you are interested in the child theme I use for My Stay At Home Adventures here's a link below.

11 Comments